In this post, we will cover how to create Advanced Search Queries and Map Filters within the xbUI widget. Additionally, we will also go over some configuration options for the Advanced Search tool available with the xbUI Widget.
Creating a Search Query
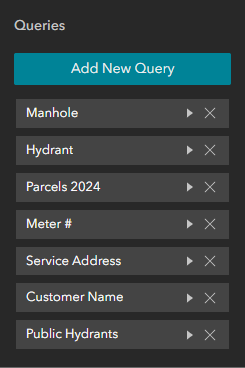
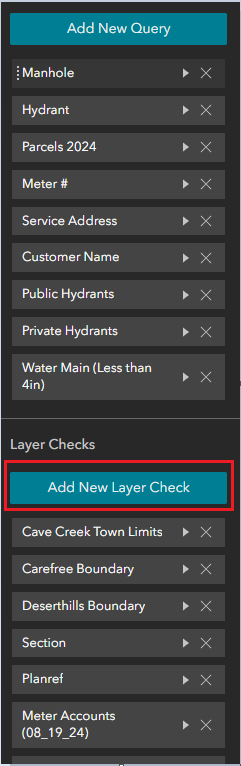
To begin, click on the “Add New Query” option within the xbUI panel.
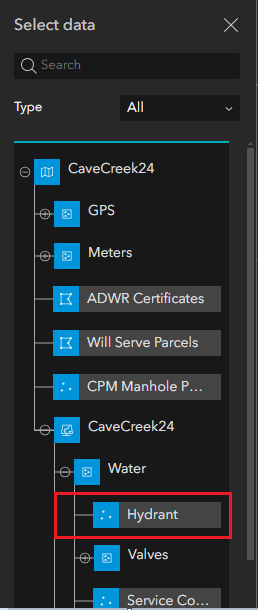
Click on “Select Data” and then we will navigate to the layer we would like to create a search query for.
In this example, we will use the “Hydrant” layer.
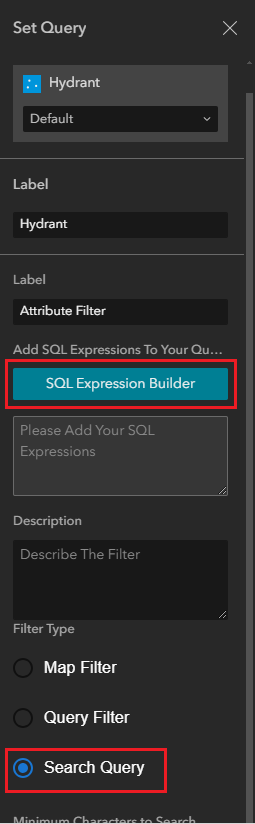
Before we create our SQL Expression, ensure that the Query is set to a “Search Query”, found at the bottom of the panel.
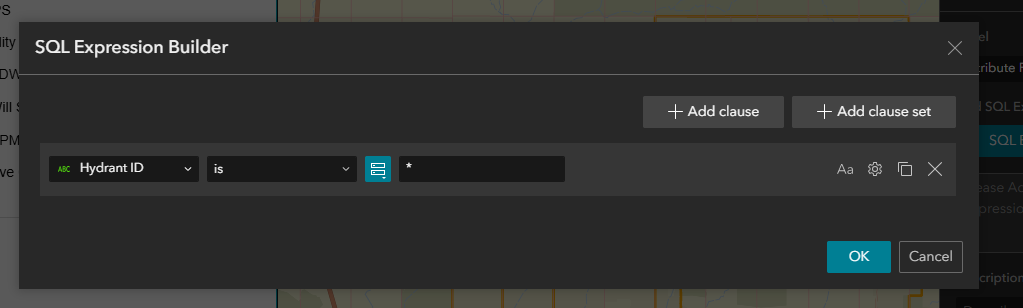
Then we will select the “SQL Expression Builder” option to create our query.
From here we will select “Add Clause” to create our expression.

For this example, we will create a search to find hydrants by the “Hydrant ID” attribute. We will navigate to the first drop down menu and select “Hydrant ID”.
Next we will select the operator, which in this case will be “contains”.
Lastly, we will input our value, which will be “*”. This allows us to search for all hydrants that match any value that we use when using the search tool. Once the SQL Expression is set, click “OK”. Make sure to save, publish and then reload your environment.

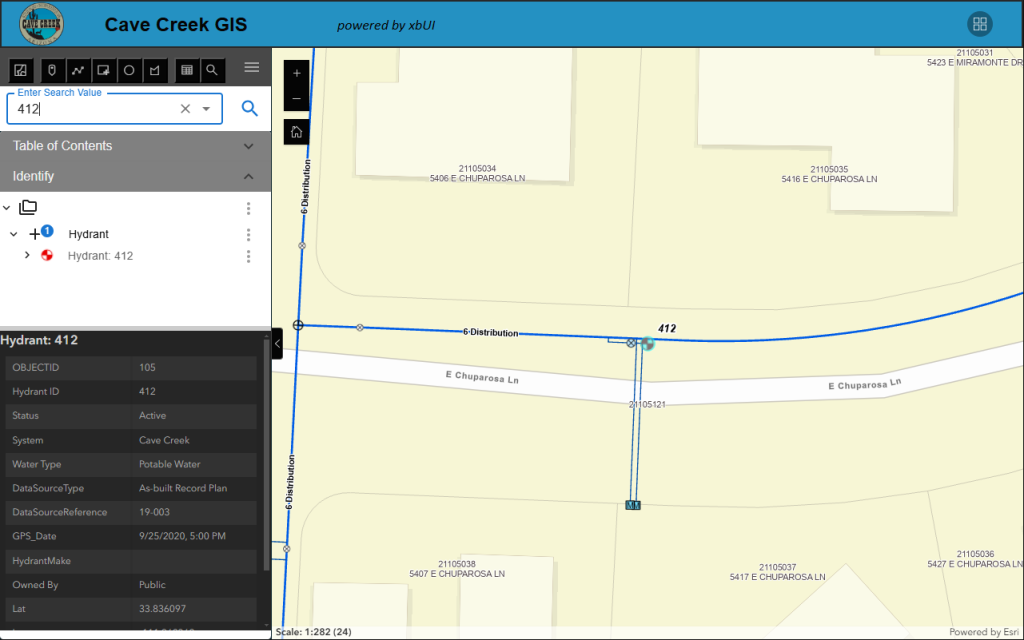
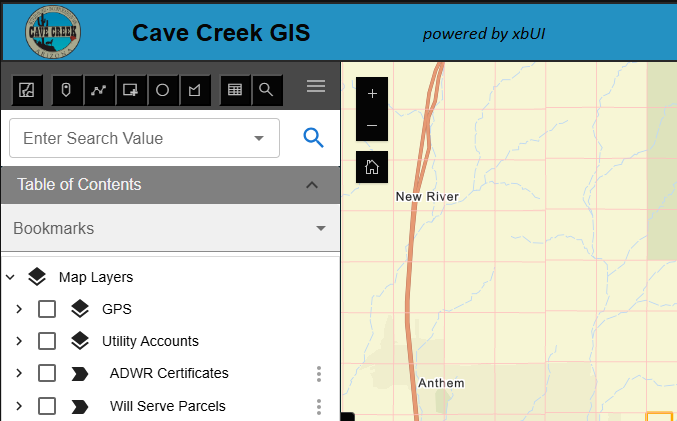
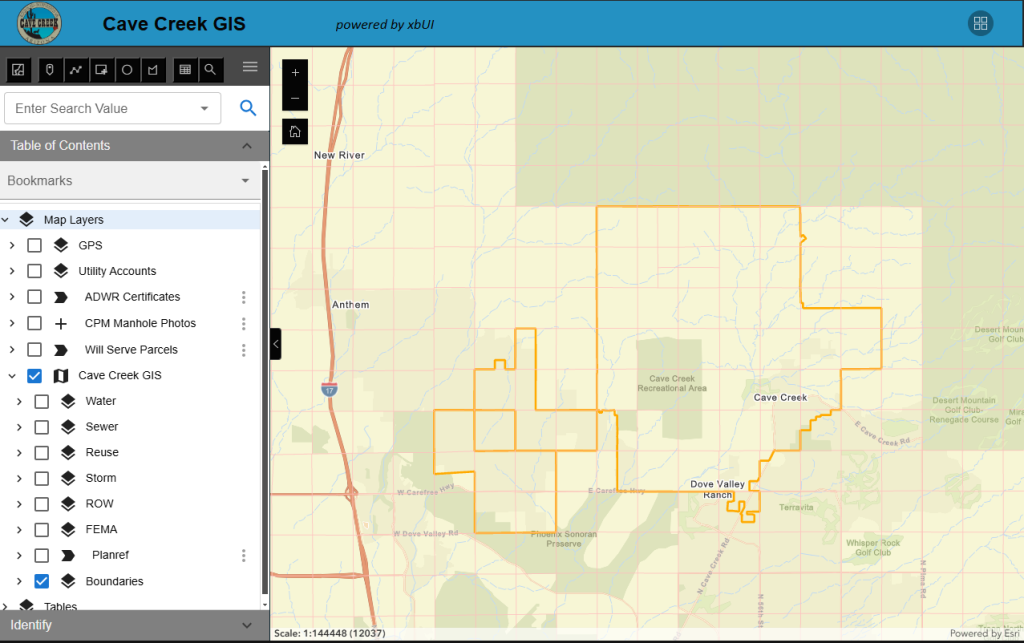
Once we reload the page, we should notice a magnifying glass in the top-left corner of our Experience Builder project next to the Selection Modes Toolbar.
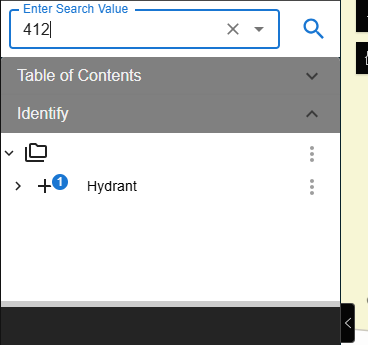
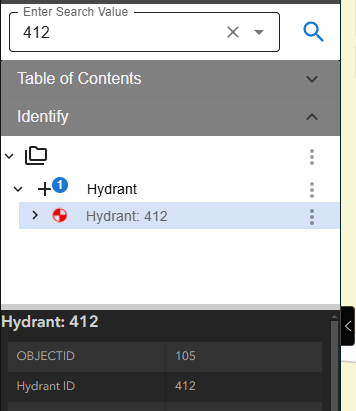
We are ready to input our value. For this example, we will search for hydrant “412”. Note that in the image below, we have multiple search queries set. The search feature will differentiate between the layers, ensuring you select the correct feature.
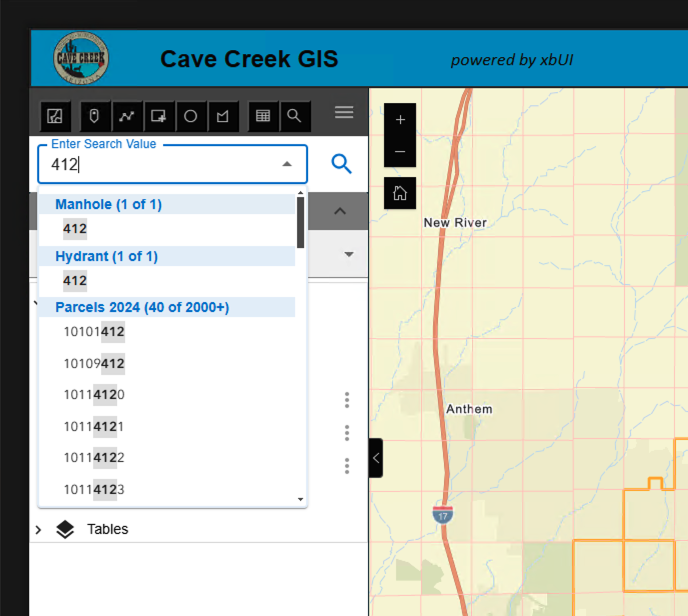
Once the feature has been selected within our search results, it will populate to the Identify menu. From here, we can select the feature and view the attributes.

Creating Map Filters
Now that we understand how to create a search query, next we will cover how to create a Map Filter.
To create a Map Filter, we will follow the same steps we performed to create our search query, but this time, we want to ensure that we set it as a “Map Filter”.
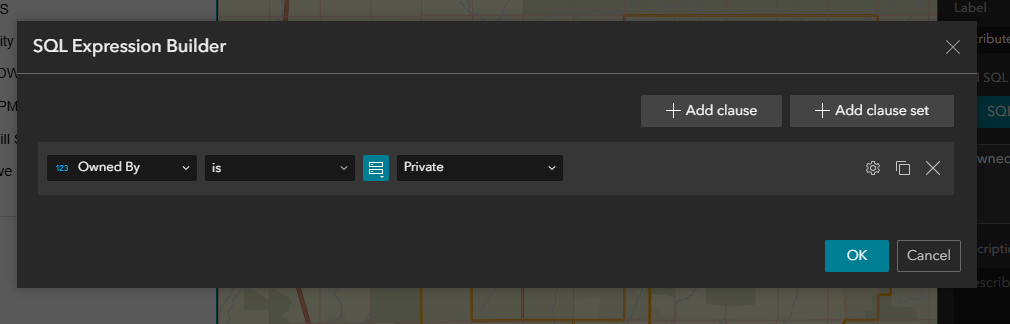
For this example, we want to be able to filter for Hydrants that have the “Owned by” field set to “Private”.
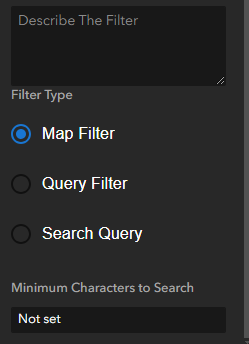
We will use “Owned by” as our field, then we will use “is” as our operator. Lastly, we will notice a drop-down this time. Within this drop-down, we will select the “Private” option. Once the SQL Expression is set, click “OK”. Then make sure to save and publish your Experience Builder project, then reload.
The filter you have just created will be within the “Bookmarks” tab of your xbUI Widget, under the Selection Modes Toolbar.
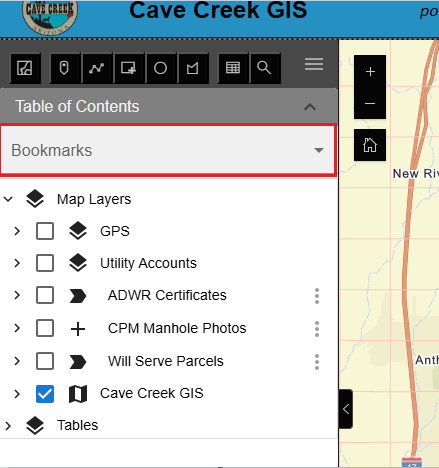
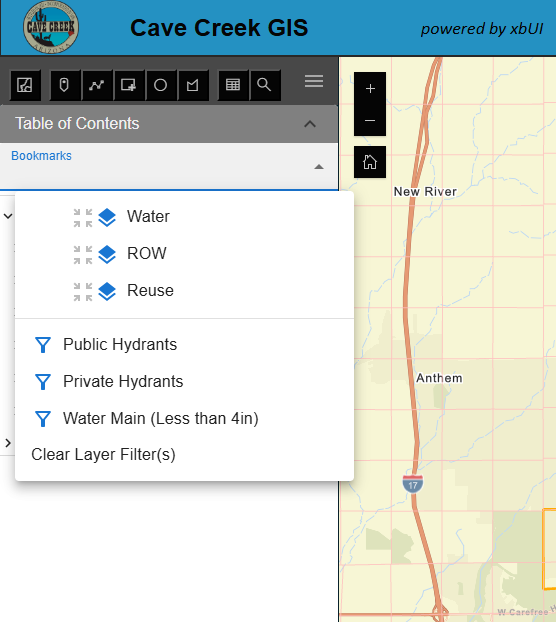
Clicking on the “Bookmarks” tab will reveal a drop down containing both the bookmarks that have been created for the project, along with the filters that were created as well.
In this image, we created multiple bookmarks and filters, but for this example we will be using the “Private Hydrants” filter that we just created.
Creating bookmarks will be covered in a separate post.
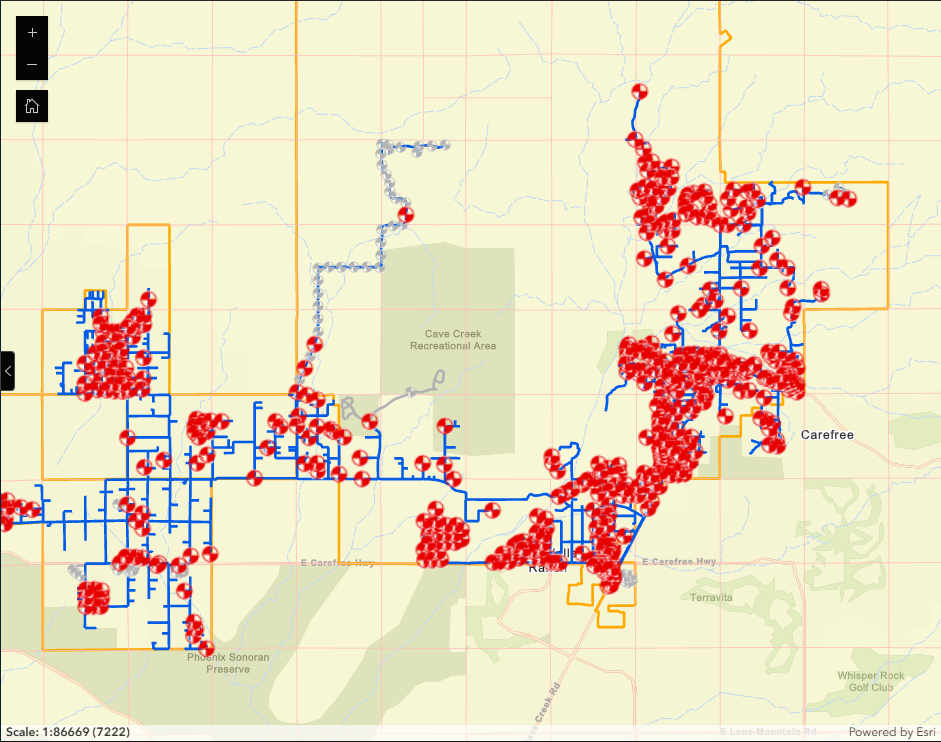
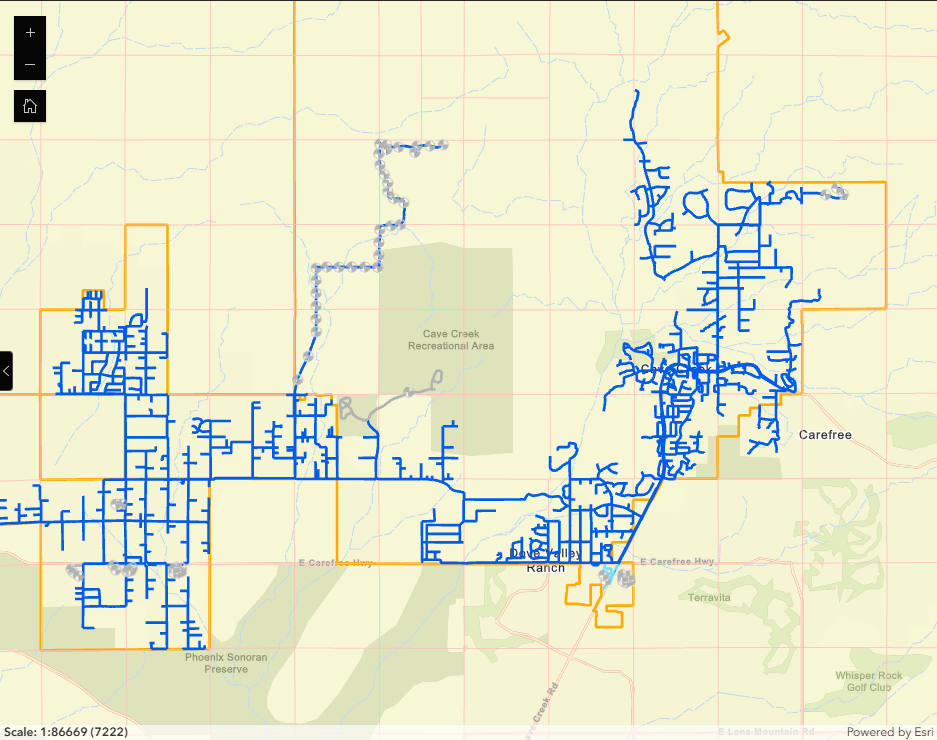
With our “Water” layer turned on within our map, we will select our “Private Hydrants” filter option. What we will notice is that all of the hydrant features within our map that do not have the “Private” attribute will all be filtered out, leaving only the private hydrants.
Additional Configuration Options
Now that we understand how to create Advanced Searches and Map Filters, let’s take a look at some of the additional configuration options available when searching for a feature by using “Layer Checks”.
The “Layer Check” tab is located right under the “Query” tab within the xbUI panel.
Start by selecting the “Add New Layer Check” option.
We will follow the same steps we performed when creating search queries and select the layer we would like to create the layer checks for.
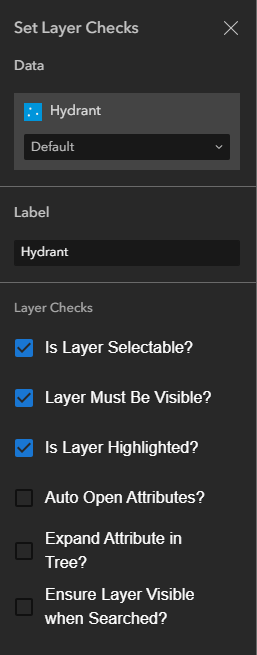
Here, we will find the layers checks that we can apply to the feature we selected.
These layer checks include:
- Is Layer Selectable?
- Layer Must be Visible?
- Is Layer Highlighted?
- Auto Open Attributes?
- Expand Attribute in Tree?
- Ensure Layer Visible when Searched?
1. Is Layer Selectable
This layer check is very straight forward. If this option is turned off, that specific layer cannot be selected within our map and it will not populate to the Identify tab.
This is a useful tool if we have city boundaries or other features that we are using in our map that are solely used for visual purposes and do not contain any relevant data.
In our example, we want to keep that on so that our hydrants can be selectable.
2. Layer Must be Visible?
This option asks if the layer has to be visible to be selected. Some layers have relevant data that we would like to see within our Identify tab, but the data might congest the map visually. This option allows us to still be able to select the specific layer, without needing to turn it on within our Table of Contents.
3. Is Layer Highlighted?
This option allows us to set whether or not a layer highlights within our map. Some larger layers, such as Zip code polygons, would muddy the map when highlighted, not allowing users to see the other features that are highlighted within a selection. With this option, the feature can still be selected, but will not highlight within the map.
4. Auto Open Attributes?
This layer check relates directly with our searchable features. While this layer check is on, a searched feature, such as our hydrants, will automatically have their attributes on full display within the Identify tab, skipping the need to navigate to the layer and select the specific feature for the attributes to show.
5. Expand Attribute in Tree?
This feature will allow us to automatically expand the selected feature within our Identify menu when we conduct a search.
For example, if we performed a search for “Hydrant 412” and then selected the feature, typically it would populate in our Identify tab like the bottom left image. Applying this layer check will automatically expand the data tree, allowing rapid access to the searched feature.
6. Ensure Layer Visible when Searched?
When searching for a feature, this layer check will automatically turn on the specific feature along with all other features within the parent layer. Meaning, we do not have to go into our Table of Contents and turn on the layer before performing a search in order to visually see our searched feature within our map.
Notice that the water layer is turned off in our Table of Contents.
Once we make our search and select the specific feature, we will notice that the map will zoom to that feature, highlight the feature and turn on the necessary layers so the feature can be displayed within our map.